Colourisation TutorialIn this tutorial we are going to learn how to colourise a black and white photo. The process itself is quite easy, and the hard part lies in getting the skin tone to look right. I don’t claim to be an expert at this myself, but I think I can come up with some pretty decent results.
I’m going to be colourising the following picture:
https://2img.net/r/ihimizer/img110/8544/06zi8.jpgHowever here are a selection of other black and white photo’s that you can practise on. It’s better if the pictures are of a good quality and not pixellated.
ONE |
TWO |
THREE |
FOUR |
FIVE |
SIX |
SEVEN |
EIGHTSKIN1. Open your chosen image to your graphics program.
2. Firstly, we’ll colour the skin. Create a new raster layer, and name it “Skin 1”. This helps us to avoid confusion later on. Take a large, soft brush (I’m using size 90, hardness 0), in #FDC689. Colour over the entirety of her face, though not the hair. Don’t worry about going over her eyes, eyebrows, teeth and lips, but try and keep within the edges of her face. Set this layer’s blend mode to Color, at 47% opacity.
3. Duplicate the layer (Layers >> duplicate), and set it to softlight at 15%. Name this layer “Skin 2”.
4. New Layer (“skin 3”). Colour over her face again in #FDC689, as we did in step two. Set this layer to softlight at 50% opacity.
5. New Layer (“skin 4”). Go over her face again in #790000. Set this to color, at 10% opacity.
6. Another new layer (“skin 5”). Colour over her face in #EFB18D. Set this to colour, at 10% opacity.
Here’s what we have so far:
STEP ONE: SKINEYES, TEETH & LIPS1. Next, we’ll colour her eyes. We’ll start with the white area. Use white (#FFFFFF) and a small brush to colour them in. Set this layer to color, at 100% opacity.
2. Now for her iris. I covered how to do eye colourisations in
this tutorial. However, I’ll just explain it quickly here. Add a new layer, and take your brush at size two. I’m going to make her eyes a dark brown, and so start by tracing the very edge of her eye in #250101. Inside of this, using a size four brush, trace a couple of rings of a lighter shade of your chosen colour. I’m using #4D1E09. Finally, fill in the rest of the iris in an even lighter shade (#803616). Finally, colour the pupil black and the light spot white.
Here’s a screenshot of what we’ve just done, in case that was confusing:

3. Now we need to blur the layer, (image >> blur >> blur more). Then, set the layer to overlay. And voila, pretty eyes.
4. Next, we’ll do her teeth. Another new layer, then use white (#FFFFFF) to colour them in, and set the layer to color at 40% opacity.
5. Lips next. New layer, and set your brush to an appropriate size. Cover her lips in #920B31, and set the layer to softlight at 50%. New layer, and cover her lips in #F397C0, with the layer set to color at 10% opacity. And that’s the lips done.
MAKE UP & EYEBROWS1. We’ll start by adding a little blusher. On a new layer, use a large, soft brush in colour #F7C6D5, and apply to her cheeks and forehead. Set this to softlight, at 80% opacity.
2. Eyebrows next. Not much needs doing to the eyebrows, so on a new layer, we’ll just sweep a light brown colour over them (#6F3C1D), set at softlight, 10% opacity.
3. Now for the fun part – make up. On a new layer, take a black-brown colour (#1B0101) and use a small brush to outline the underneath and top of her eyelids – eyeliner. Set this to softlight, at around 30% opacity. Erase anything that looks a little strange.
4. New layer, and time for eyeshadow. You can choose any colour you like, but I’m going to go with a purplish colour (#420143). New layer, and just apply the colour as you see fit. Set the layer to softlight. I find that it’s easier to apply more colour, and use a large eraser to take off any excess. I usually find that it’s not necessary to add any more colour to the eyelashes, and so the make up is now done.
HAIR1. If you can tell that the model in the original picture has dark hair, then stick to a dark colour (brunette and black). If she originally had blonde hair, then you can go for any colour you wish.
I’m going to colour her hair a very dark brown (#250901). On a new layer, colour over her hair, and then set the layer to color at 100%. Duplicate this layer, and set the the duplicate to softlight, 100%.
2. Colour any extras the photo might have, for example fingernails (or in my case, the make up brush). Always remember to do everything on a new layer.
LAST STEP1. Merge all of the layers, then duplicate the merged layer.
2. Add a guassian blur of 3 pixels to the top layer (image >> blur >> guassian blur), then set the layer to softlight at 20% opacity. This just gives the image a bit more depth.
3. Merge the layers again, and we’re done! Save as a .png image (it gives a better quality) and there you have it. A beautiful colourisation!
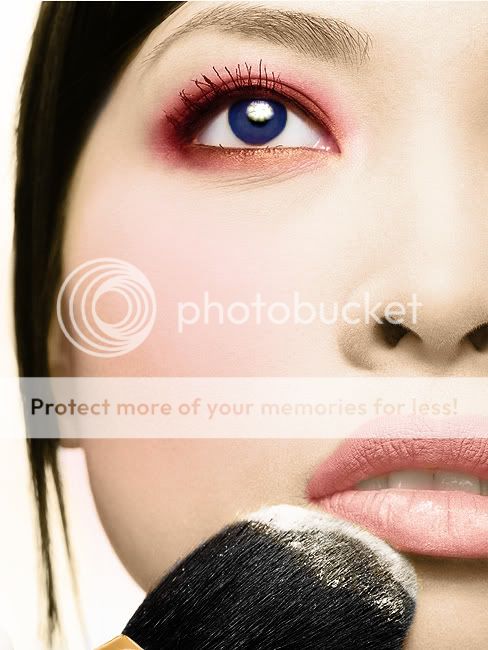
Here is my finished product:
As always, I'd love to see what you do with this tutorial, so post your results in this thread!


